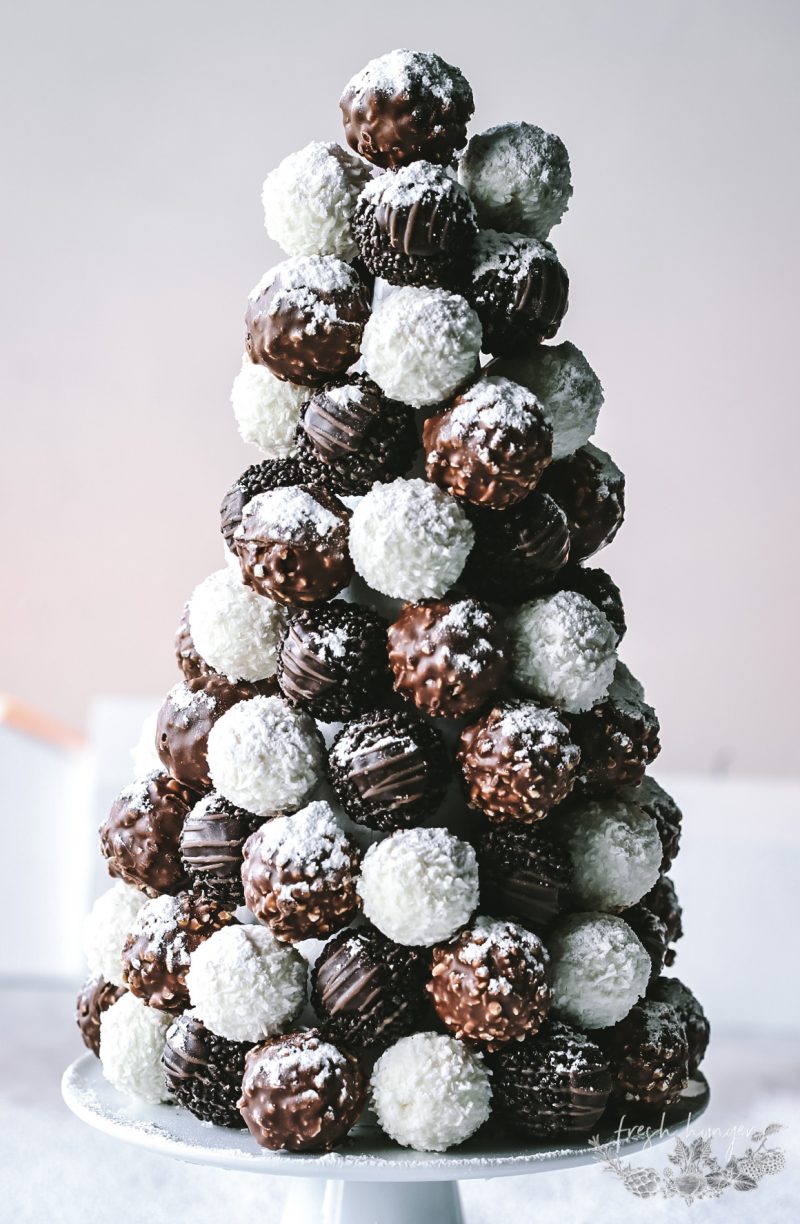
Back when I was food editor for a Canadian food magazine, I created a Chocolate Christmas Tree for the cover of the December issue of the magazine. Then, I used my chocolate truffle recipes I’d developed but as I want this ‘recipe’ to be part of a series of easy Christmas treats, I opted to use Ferrero Roche chocolate balls in white, milk and dark chocolate. Apart from some chocolate unwrapping (I’ve had lots of practice doing that over the years so it took me almost no time) and attaching said chocolate balls onto the styrofoam cone, there is very little effort required to make this festive, edible tree.
Jump to Recipe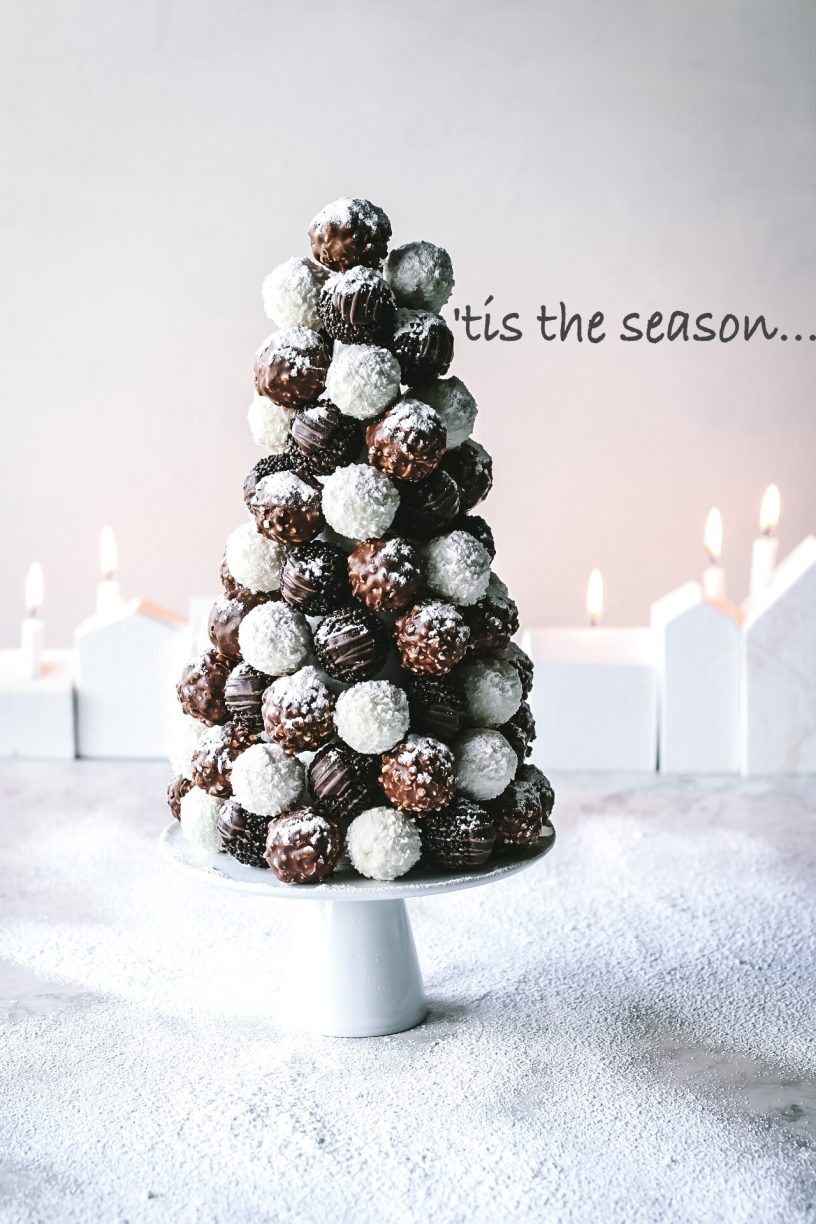

The styrofoam cones I bought from Amazon but craft stores such as Michael’s or Hobby Lobby sell them. I think Walmart does too. The recipe gives the details about size of the cone but really, you could do any size you want, you just have to have enough chocolates to cover it. Also, feel free to cover the cone in gold or silver paper. I was going for a white scene so I left it as-is.
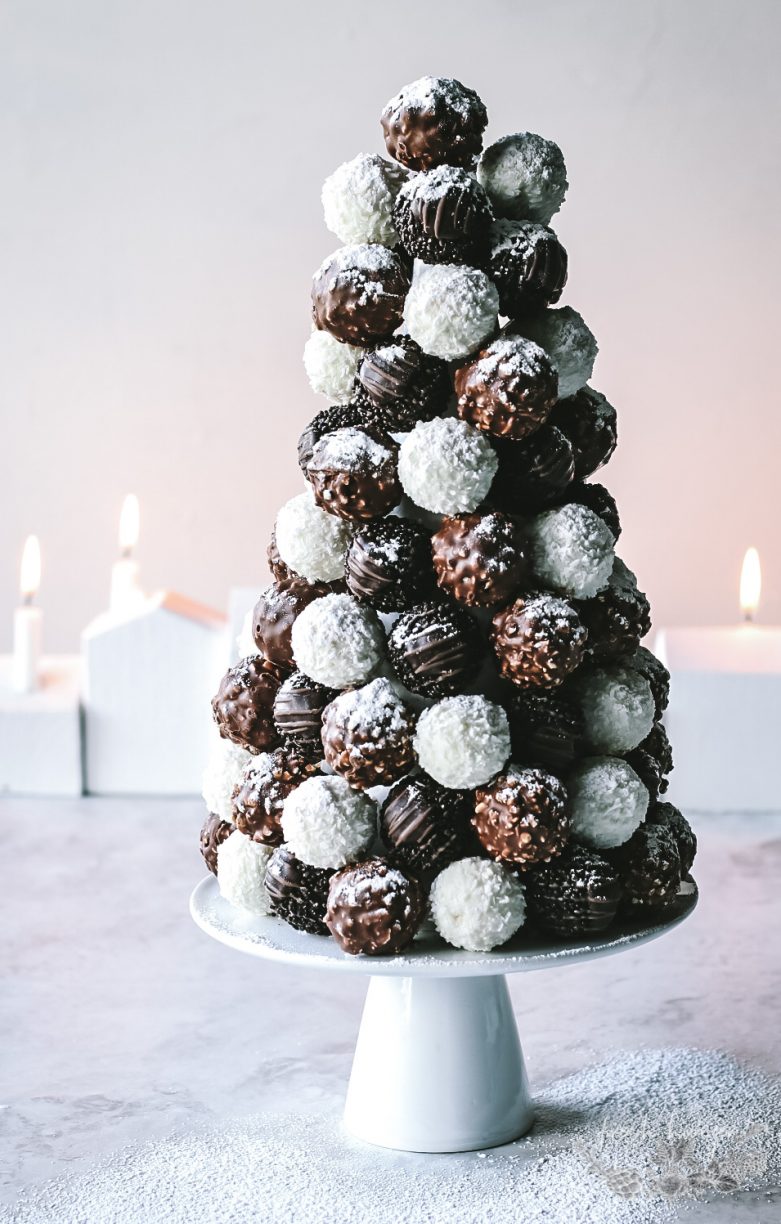
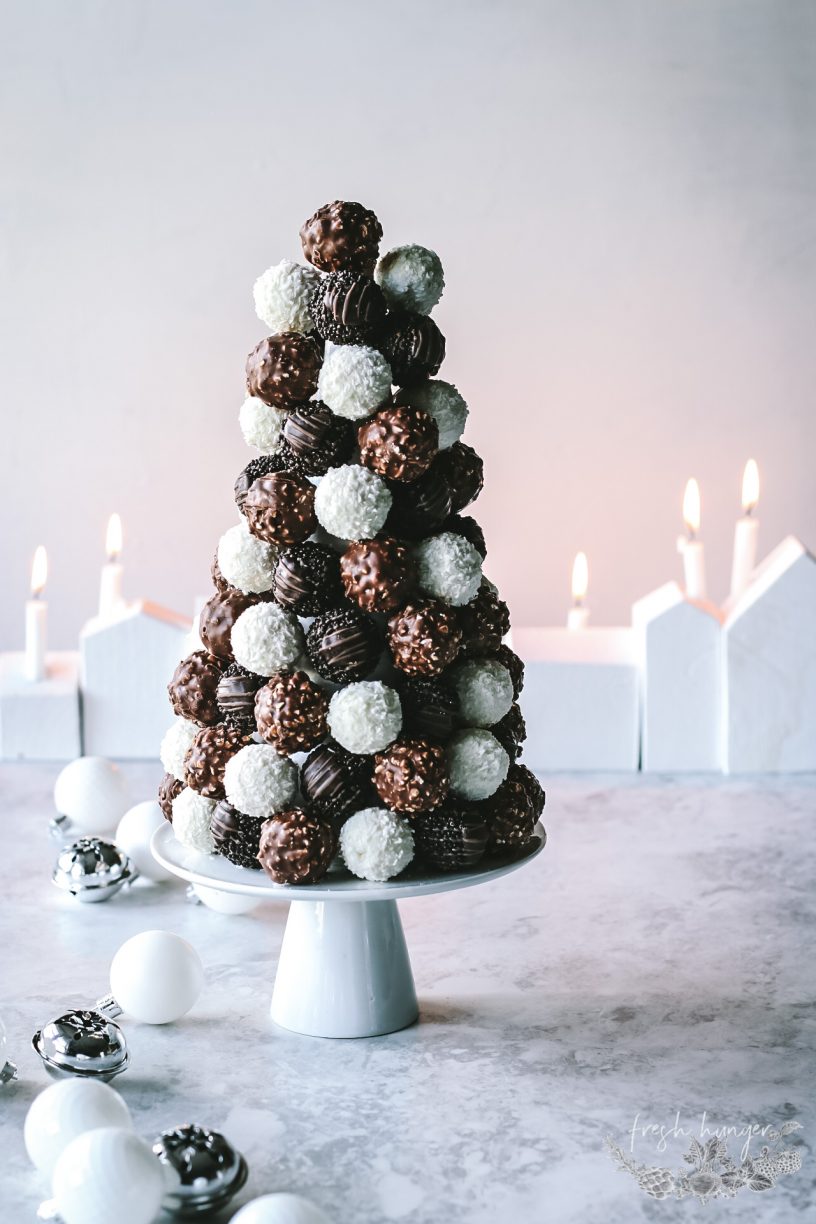


I think an all white tree would be gorgeous, three of them even better if you have the time. Start to finish this will take about an hour, and there’s no cooking. Even less time if you have some help to unwrap the chocolates. For me, help is always appreciated in the kitchen during the holidays. It doesn’t always happen but one can live in hope. Chat to you soon, love Lovoni xo
If you’re a white chocolate and coffee lover and don’t want to mess with baking these holidays then you have to try this White Chocolate Coffee Cheesecake recipe.

CHOCOLATE CHRISTMAS TREE
Ingredients
- 2 tablespoons chocolate chips, melted
- 6- inch plate
- 1 styrofoam cone, about 9 inches high 23cm
- 85 or so toothpicks
- 85 approximately chocolate balls – such as Ferrero Roche, unwrapped
- Icing sugar for dusting
Instructions
- Spread some of the melted chocolate in the center of the plate. Place the cone on the chocolate and press lightly to secure to the plate. Let stand for 5 minutes to set.
- Start building the tree from the bottom of the cone up. Place a toothpick into the cone about 1/2 inch from the bottom leaving about 1/2 inch protruding. Place one of the balls on the toothpick. Repeat with the remaining toothpicks and balls, arranging the balls in a brick-like pattern rather than one on top of the other. As you work your way up the cone, you will want to cut the toothpicks smaller so they don’t poke through the other side of the cone. Dust with icing sugar if desired.

You may also like
 When butter is left simmer slowly to turn golden brown, it develops a rich,...
 If you're a potato lover or you serve roasted potatoes for any special meal such...
 We all have a recipe (or several) we go back to time & again, especially aro...
 Quintessential wintery parsnips & pears tossed together with maple syrup, fr...